 PLATFORMS
SOLUTIONS
BLOGS
CONTACT
☰
PLATFORMS
SOLUTIONS
BLOGS
CONTACT
☰

Many organizations use Parquet files as a storage format for efficient data analysis. However, due to the
complexity of the file format itself, Parquet files cannot easily be consumed by database platforms for reporting
or ad-hoc querying purposes. DataZen solves this problem by easily copying Parquet files into a relational database,
and replicate changes identified to Parquet files over time to keep the database synchronized.
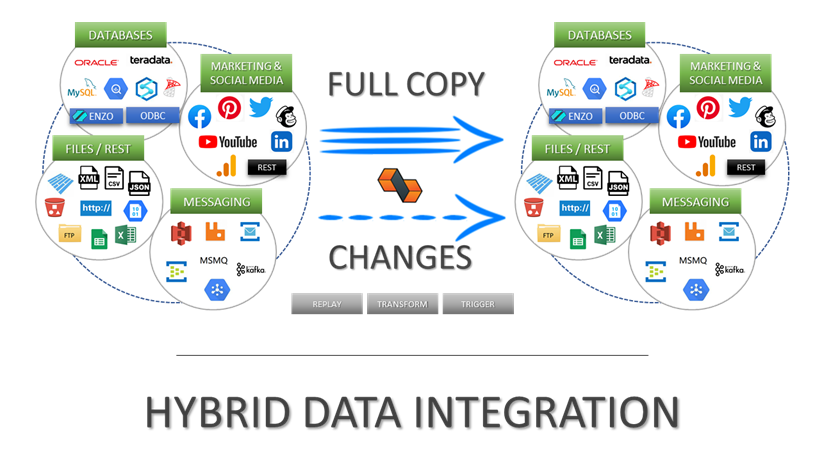
In this example, we will configure DataZen to read Parquet files from a local drive, and forward both
the initial set of records, and ongoing changes detected to a SQL Server database. It should be noted that DataZen
is able to automatically identify and extract changes using a "micro-batch" pattern from any source system,
including Parquet files.
DataZen supports Parquet files natively without requiring the use of an ODBC driver.

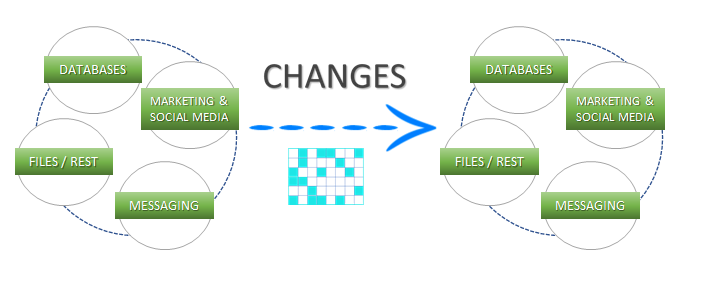
DataZen sends all available records read from Parquet files (with optional filtering) as an initial load the first time the job runs;
once the data has been replicated the first time into a SQL Server database, DataZen automatically
detects changes over time and sends changes to the SQL Server database.
The main advantage of replicating Parquet files into a relational database such as SQL Server is to enable
power users to query data using the flexibility of the SQL language and to more easily build reports.
In this example, we will be using Parquet files located on the local drive. DataZen offers the option
to read subdirectories in case the files are spread out logically in sub-folders. Let's first create a
Direct Data Sync Jobs.
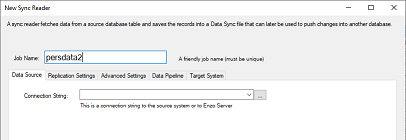
To create a Direct Job, start DataZen, click on the desired Agent (at least one agent must be registered),
and select NEW -> Direct Data Sync Job from the context menu.

Enter a Job Name, and specify a Drive Connection to the source system. To create a new connection,
click on the ellipses ....
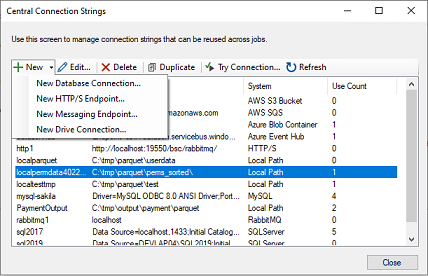
Choose New -> Drive Connection.
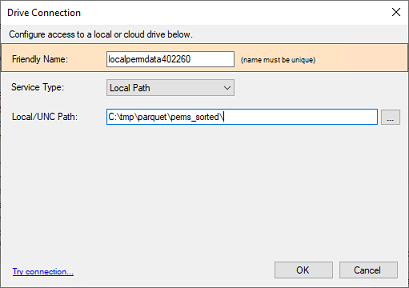
Enter a name for the connection, select Local Path, and enter a directory where the Parquet files are located.
You can also create a connection that points to an AWS Bucket or an Azure Container. To do so, choose the corresponding option in the Service Type dropdown.
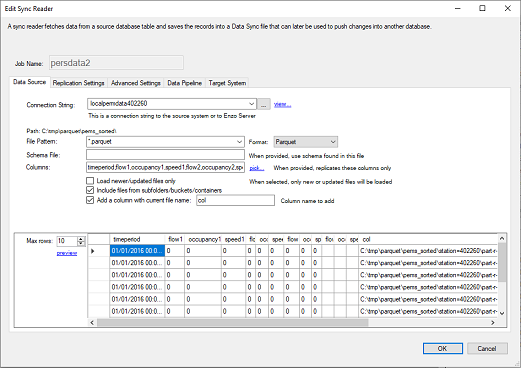
Once you have created the connection, and closed the Central Connection Strings window, select it from the Connection String dropdown. The user interface will change to show you additional options.
Enter a name for the Parquet file to read. You can enter a wildcard to read multiple files in parallel.
In addition, you can choose the option to Include files from subfolders.
If no columns are specified, all available columns will be returned. You can also add a dynamic column
that includes the name of the Parquet file the record comes from by checking the option
Add a column with current file name.
Click the Preview link to validate the data is being read successfully from the Parquet files.
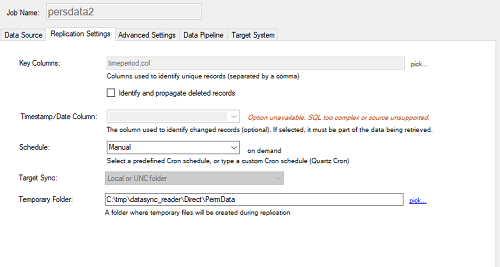
Click on the Replication Settings tab and select a Key Column (in this example, we picked
two columns: timeperiod and col). Make sure you choose a combination of fields that identifies a unique record.
To propagate delete operations, check the
Identify and propagate deleted records.
Choose a replication schedule (as a Cron expression), and select a folder in which the Sync files will be created.
You can leave the schedule to Manual; however, this means that the replication will only run when started manually.
Click on the Target System tab and specify a target connection string. We will be using a
SQL Server connection. Similarly to the steps shown previously for creating a Central Connection String,
create a new connection that uses the
The SQL Server (Native Provider) offers a high performance MERGE operation that can significantly improve database performance when inserting, updating, and deleting data.
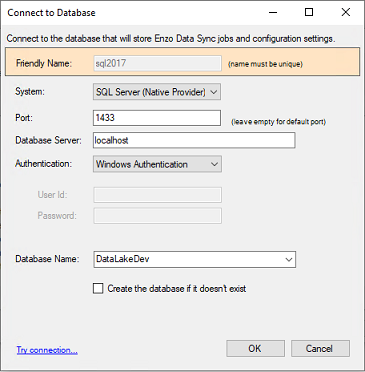
Once you have created the SQL Server connection string, select it from the dropdown list. Then, check the Use the high performance MERGE operation option. Enter the name of the target table in which records will be added. In this example, we have entered [parquet].[persdata].
Because the target system is a relational database, you can create the target table directly by clicking the View/Run Table Creation Script button. See the DataZen User Guide for instructions on how to create target tables.
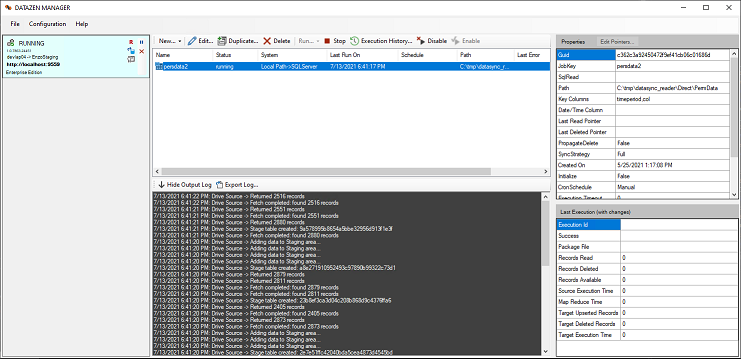
Click OK to create the Direct Job.

If you have selected a Schedule (Cron Expression) the job will start immediately; otherwise you will need to click on the Start icon for the job. The example provided selects records from Parquet files and forwards them to a SQL Server table. The first time the job runs, all the records will be sent to the database table; then as changes take place in the Parquet files (or as additional Parquet files are created), new, deleted and updated records will be sent to the database table.
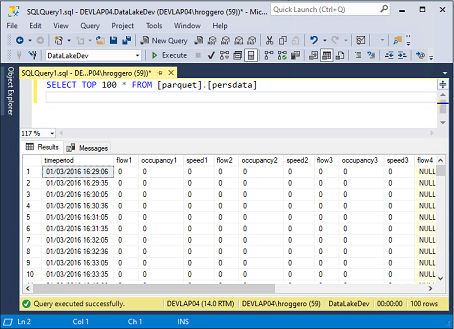
To verify the data is being added to the table, connect to your database server, and run a SELECT command that returns the data that was inserted from Parquet Files. The SQL command used in this example is:
SELECT TOP 100 * FROM [parquet].[persdata]
This blog shows you how you can easily replicate Parquet files to a SQL Server table. With minimal configuration,
DataZen can continuously monitor Parquet files on local drives, or in the cloud, and replicate any changes
to any relational database, messaging platform or other Parquet files.
To try DataZen at no charge,
download the latest edition of DataZen on our website.
Integrate data from virtually any source system to any platform.
Support for High Watermarks and fully automated Change Data Capture on any source system.
Extract, enrich, and ingest data without writing a single line of code.
To learn more about configuration options, and to learn about the capabilities of DataZen,
download the User Guide now.
© 2025 - Enzo Unified